
Olimex STM32-H152 ARM Microcontroller development with ChibiOS/RT from Linux command line interface

A previous post demonstrated how to implement a sample ChibiOS system for the Olimex STM32-H152 platform from eclipse under windows. This follow up post will show how to achieve the same results using a linux-based computer.
Materials

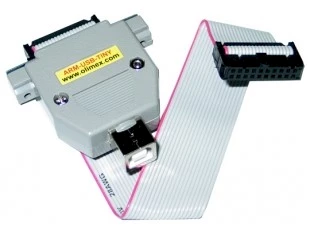
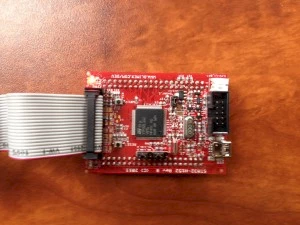
We are using the same platform as the original tutorial which is a Olimex STM32-H152. The board is based on the STMicroelectronics STM32L processor. The exact specifications are available on the original post. We are also using the same ARM USD JTAG debugger with OpenOCD.
Development environment
For this tutorial we use a 64 bits machine running Fedora 21. For this post unlike the previous one we will use the typical tools available from the gnome shell rather than eclipse integration. We will first create a project directory
mkdir
cd
We will need to get the ChibiOS latest version from the ChibiOS website (through sourceforge).
wget http://downloads.sourceforge.net/project/chibios/ChibiOS_RT%20stable/Version%202.6.7/ChibiOS_2.6.7.zip
unzip ChibiOS_2.6.7.zip
The packages provides a bunch of configuration scripts and templates we can use for our project. While we could edit the files directly under the unzipped packages we will still create a copy to stay true with the original example while avoiding to modify the original package. Therefore once we move from "tutorial" to "real project" code reuse and updates should be somewhat easier. So at this point we will create a project directory in which we will copy ChibiOS' example:
cp ./ChibiOS_2.6.7/demos/ARMCM3-STM32L152-DISCOVERY/* .
We will replace the content of the main.c file with:
#include "ch.h"
#include "hal.h"

int main(void) {
  halInit();
  chSysInit();
  palSetPadMode(GPIOE, GPIOE_PIN10, PAL_MODE_OUTPUT_PUSHPULL);
  while (TRUE) {
    palSetPad(GPIOE, GPIOE_PIN10);
    chThdSleepMilliseconds(500);
    palClearPad(GPIOE, GPIOE_PIN10);
    chThdSleepMilliseconds(500);
  }
}
Finally we will need the ARM toolchain:
wget https://launchpad.net/gcc-arm-embedded/4.9/4.9-2015-q1-update/+download/gcc-arm-none-eabi-4_9-2015q1-20150306-linux.tar.bz2
tar -xjf gcc-arm-none-eabi-4_9-2015q1-20150306-linux.tar.bz2
This tarball includes both the gcc arm compiler used by the ChibiOS makefiles and the gdb debugger. To make it all work we will need some packages. If your platform is 32 bits already you will not need to perform:
sudo yum install glibc.i686 ncurses-devel.i686
We are almost done. We will add our toolchain binaries in our PATH variable:
export PATH=/gcc-arm-none-eabi-4_9-2015q1/bin:$PATH
At this point we aren't missing any component to build the image. However we will have to edit the Makefile so we can set the CHIBIOS make variable to what we want. So all you have to do is change the line where the CHIBIOS variable is set:
# Imported source files and paths
CHIBIOS = ./ChibiOS_2.6.7
include $(CHIBIOS)/boards/ST_STM32L_DISCOVERY/board.mk
include $(CHIBIOS)/os/hal/platforms/STM32L1xx/platform.mk
include $(CHIBIOS)/os/hal/hal.mk
include $(CHIBIOS)/os/ports/GCC/ARMCMx/STM32L1xx/port.mk
include $(CHIBIOS)/os/kernel/kernel.mk
include $(CHIBIOS)/test/test.mk
And we should be able to build our image:
make
The sample Makefile creates a build directory with you will find the files generated by it. Now to operate the JTAG will will use OpenOCD:
sudo yum install openocd
OpenOCD provides the required config files needed for that board. Once the board is connected to the computer through the JTAG with a USB cable you can launch OpenOCD with:
sudo openocd -f /usr/share/openocd/scripts/interface/ftdi/olimex-arm-usb-tiny-h.cfg -f /usr/share/openocd/scripts/target/stm32l.cfg -c "init" -c "reset"
The sudo is mandatory since you need to access the proper /dev/usbmon# device node for those less familiar with linux or any unix system for that matter. The output should look like:
Open On-Chip Debugger 0.8.0 (2014-06-07-21:57)
Licensed under GNU GPL v2
For bug reports, read
        http://openocd.sourceforge.net/doc/doxygen/bugs.html
Info : only one transport option; autoselect 'jtag'
adapter speed: 100 kHz
adapter_nsrst_delay: 100
jtag_ntrst_delay: 100
cortex_m reset_config sysresetreq
Info : clock speed 100 kHz
Info : JTAG tap: stm32l.cpu tap/device found: 0x4ba00477 (mfg: 0x23b, part: 0xba00, ver: 0x4)
Info : JTAG tap: stm32l.bs tap/device found: 0x06416041 (mfg: 0x020, part: 0x6416, ver: 0x0)
Info : stm32l.cpu: hardware has 6 breakpoints, 4 watchpoints
Info : JTAG tap: stm32l.cpu tap/device found: 0x4ba00477 (mfg: 0x23b, part: 0xba00, ver: 0x4)
Info : JTAG tap: stm32l.bs tap/device found: 0x06416041 (mfg: 0x020, part: 0x6416, ver: 0x0)
Which is pretty reminiscent of the one we saw in the previous
#include "ch.h"
#include "hal.h"

static int fib_array[10] = {-1,-1,-1,-1,-1,-1,-1,-1,-1,-1};static int fibonacci(int);

static int recur_fibonacci(int);

int main(void);
int main(void) {

  int base_time = 50;
  int incr = 0;
  int time = 500;
  halInit();
  chSysInit();
  palSetPadMode(GPIOE, GPIOE_PIN10, PAL_MODE_OUTPUT_PUSHPULL);
  while (TRUE) {
    if(incr > 8) incr = 0;
    time = base_time * fibonacci(incr);
    palSetPad(GPIOE, GPIOE_PIN10);
    chThdSleepMilliseconds(time);
    palClearPad(GPIOE, GPIOE_PIN10);
    chThdSleepMilliseconds(500);
    ++incr;
  }
}

static int fibonacci(int n){
  // fibonacci sequence is f(n) =  f(n-1) + f(n-2)

  if(fib_array[n] == -1)
    fib_array[n] = recur_fibonacci(n);

  return fib_array[n];
}

static int recur_fibonacci(int n){

  if(n == 0)
    return 1;
  if(n == 1)
    return 1;
  return fibonacci(n-2) + fibonacci(n-1);
}
The non-linear blinking where the unlit phase would grow proportional to the Fibonacci sequence. Very soothing. Without forgetting to recompile the code we are ready to run the debugger to update the image on the board. We reused the exact same gdb file (openocd.gdb) from the other tutorial recopied here for convenience:
 target remote localhost:3333
 monitor reset halt
 monitor wait_halt
 monitor sleep 100
 monitor poll
 monitor flash probe 0
 monitor flash write_image erase ./build/ch.bin 0x08000000
 monitor sleep 200
 monitor soft_reset_halt
 monitor wait_halt
 monitor poll
 symbol-file ./build/ch.elf
 thbreak main
 continue
You can then launch gdb with the one provided with the toolchain that should still be in your PATH environment variable:
arm-none-eabi-gdb -x openocd.gdb
which should prompt an interactive gdb console that will first flash the new image and then break at the main function from main.c:
GNU gdb (GNU Tools for ARM Embedded Processors) 7.8.0.20150304-cvs
Copyright (C) 2014 Free Software Foundation, Inc.
License GPLv3+: GNU GPL version 3 or later <http: gnu.org="" gpl.html="" licenses="">
This is free software: you are free to change and redistribute it.
There is NO WARRANTY, to the extent permitted by law.  Type "show copying"
and "show warranty" for details.
This GDB was configured as "--host=i686-linux-gnu --target=arm-none-eabi".
Type "show configuration" for configuration details.
For bug reporting instructions, please see:
<http: bugs="" gdb="" software="" www.gnu.org="">.
Find the GDB manual and other documentation resources online at:
<http: documentation="" gdb="" software="" www.gnu.org="">.
For help, type "help".
Type "apropos word" to search for commands related to "word".
0x00000000 in ?? ()
JTAG tap: stm32l.cpu tap/device found: 0x4ba00477 (mfg: 0x23b, part: 0xba00, ver: 0x4)
JTAG tap: stm32l.bs tap/device found: 0x06416041 (mfg: 0x020, part: 0x6416, ver: 0x0)
target state: halted
target halted due to debug-request, current mode: Thread
xPSR: 0x01000000 pc: 0x08000160 msp: 0x20000400
background polling: on
TAP: stm32l.cpu (enabled)
target state: halted
target halted due to debug-request, current mode: Thread
xPSR: 0x01000000 pc: 0x08000160 msp: 0x20000400
STM32L flash size is 128kb, base address is 0x8000000
flash 'stm32lx' found at 0x08000000
auto erase enabled
wrote 8192 bytes from file ./build/ch.bin in 1.989375s (4.021 KiB/s)
requesting target halt and executing a soft reset
soft_reset_halt is deprecated, please use 'reset halt' instead.
target state: halted
target halted due to breakpoint, current mode: Thread
xPSR: 0x01000000 pc: 0x08000160 msp: 0x20000400
background polling: on
TAP: stm32l.cpu (enabled)
target state: halted
target halted due to breakpoint, current mode: Thread
xPSR: 0x01000000 pc: 0x08000160 msp: 0x20000400
Hardware assisted breakpoint 1 at 0x8000102: file main.c, line 9.
Temporary breakpoint 1, main () at main.c:9
9           palSetPad(GPIOE, GPIOE_PIN10);
(gdb)</http:></http:></http:>
Typing continue in the gdb shell prompt should let the blinking go! The natural variation of the blinking tailored on the Fibonacci sequence should invariably hypnotize you into a blissful trance of satisfaction of an embedded job well done.
It is just as easy to play with the Olimex STM32-H152 board from a linux computer with ChibiOS realtime OS as from eclipse under windows.