Piloting a boat with an Android application

Spiria employees are encouraged to spend some time at work on pet projects that support skills development. One of these projects, dreamt up by developer Marc Tesson, was to pilot a radio-controlled boat through an Android application. A team of four developers with no experience with either the Android platform or the single-board Raspberry Pi mini-computer, got together to develop this application that required knowledge in both programming and electronics. It took eight four-hour sessions to finish the project. Marc tells us about the progress of their work over the eight sessions and the hazards they encountered. He also shares their code, in case you’re also interested in piloting a boat (or any radio-controlled toy) with a mobile app:
Session #1, “Hello World”
At first, we thought we’d pilot a submarine, but the fact that Wi-Fi and Bluetooth signals travel poorly in water added a layer of complexity that would have made it too time-consuming without adding any significant value with regards to the main goals of the project: to familiarize ourselves with Android and single-board mini-computers. We therefore fell back on a boat, specifically this superb Power Venom (UDI 001) with a cruising speed of 20km/h thanks to its powerful motor and V-shaped hull:

Power Venom (UDI 001). © Ripmax Ltd.
To carry out our project, we will replace the electronic part of the boat with a Raspberry Pi. This computer has many pins (GPIO) that can be used to “read” and “write” to drive devices. In our case, it is about controlling the motor and other systems.
After a simple and quick installation, the minicomputer was ready for use with its graphical interface. With a few lines of code in Python, and using the GPIO library to write on the pins, it was very simple to switch on an LED; it simply needs a power supply (and a resistor) to switch on:
# Import the GPIO library
import RPi.GPIO as GPIO

# Set the GPIO mode : define the pin numbering we are going to use (BCM vs BOARD)
GPIO.setmode(GPIO.BCM)

# Initialize the pin #23 (BCM mode) as an output : we are going to write to it
GPIO.setup(23,GPIO.OUT)

# Write a HIGH value to pin #23 : it will output a positive voltage
GPIO.output(23,GPIO.HIGH)
# The LED connected to pin #23 is now ON

# Write a LOW value to pin #23 : it will output no voltage (or close to none)
GPIO.output(23,GPIO.LOW)
# The LED connected to pin #23 is now OFF
You can also connect several of them and make them blink:
import RPi.GPIO as GPIO
import time

kRedPin = 23
kYellowPin = 24
kGreenPin = 25

GPIO.setmode(GPIO.BCM)
GPIO.setup(kRedPin,GPIO.OUT)
GPIO.setup(kYellowPin,GPIO.OUT)
GPIO.setup(kGreenPin,GPIO.OUT)

for i in range (1,3):
    GPIO.output(kRedPin,GPIO.HIGH)
    time.sleep(1)
    GPIO.output(kRedPin,GPIO.LOW)

    GPIO.output(kYellowPin,GPIO.HIGH)
    time.sleep(1)
    GPIO.output(kYellowPin,GPIO.LOW)

    GPIO.output(kGreenPin,GPIO.HIGH)
    time.sleep(1)ArduinoMini
    GPIO.output(kGreenPin,GPIO.LOW)
And it is just as easy to simply run the 5V DC motor that is supplied with our starter kit:
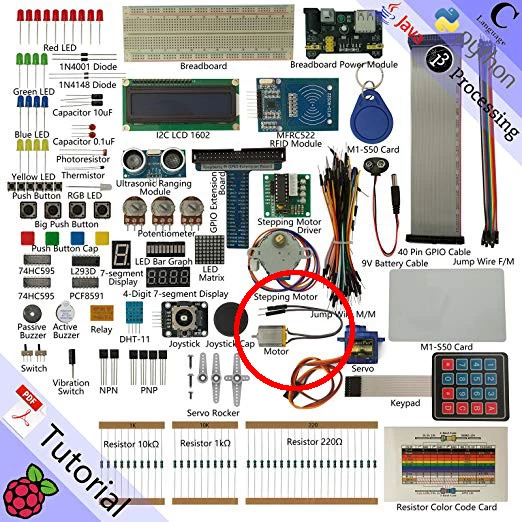
import RPi.GPIO as GPIO

kMotorPin = 13

GPIO.setmode(GPIO.BCM)
GPIO.setup(kMotorPin,GPIO.OUT)

GPIO.output(kMotorPin,GPIO.HIGH)
time.sleep(5)
GPIO.output(kMotorPin,GPIO.LOW)
Controlling a servomotor is a little more complicated:
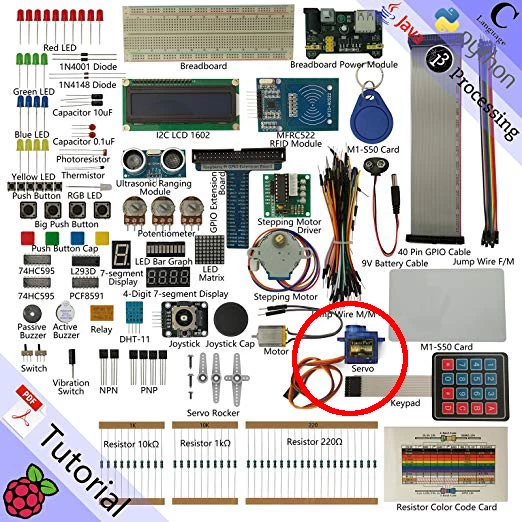
A servo works with Pulse Width Modulation (PWM). The position of the servo depends on the duty cycle of the signal being sent to it:
import RPi.GPIO as GPIO
import time

kServo = 12

GPIO.setmode(GPIO.BOARD)
GPIO.setup(kServo, GPIO.OUT)

# Create a PWM instance on the servo pin for a 50Hz frequency
myServo = GPIO.PWM(kServo, 50)
myServo.start(7.5)

# turn towards 90 degree
myServo.ChangeDutyCycle(7.5)
time.sleep(1)

# turn towards 0 degree
myServo.ChangeDutyCycle(2.5)
time.sleep(1)

# turn towards 180 degree
myServo.ChangeDutyCycle(12.5)
time.sleep(1)
Meanwhile, the two developers assigned to the Android side of the project had been working on installing Android Studio. Creating an empty application is relatively easy. To install this new application on the phone, you must first connect the phone to the computer and then activate the “developer mode”. Once this mode is activated, you can transfer the package from the Android Studio application to the phone with a single click. After a few more clicks, our developers managed to add a button and text to the application interface. A “click event” on the button changes the displayed text.
public class MainActivity extends AppCompatActivity {
    @Override
    public void onCreate(Bundle savedInstanceState) {
        super.onCreate(savedInstanceState);
        setContentView(R.layout.activity_main);
        ...
        Button myButton = (Button)findViewById(R.id.myButton);
        myButton.setOnClickListener(onMyButtonClicked);
        ...
    }

    private OnClickListener onMyButtonClicked = new OnClickListener() {
        public void onClick(View v) {
            TextView myText = (TextView) findViewById(R.id.myText);
            myText.setText("myButton has been clicked");
        }
    };
}
At the end of the session, the team found it very easy to get started with the Raspberry Pi: it is nothing more or less than a computer, after all. The Python language combined with the GPIO library allows simple devices to be controlled in no time at all. On the Android side, creating and deploying a simple application is also easy: “click and drag” widgets in the layout. Perhaps the most difficult thing is to position widgets correctly in relation to each other.
Session #2, communicating
To use the phone as a remote control, we needed a connection between the server (the Raspberry Pi) and the client (the phone). To do this, we used the Bluetooth port of both our devices.
On the Raspberry Pi
Enable Bluetooth at the system level:
// Reset the Bluetooth adaptor
sudo hciconfig hci0 reset

// Restart de Bluetooth service
sudo service bluetooth restart

// Make the RaspberryPi discoverable
sudo hciconfig hci0 piscan
Use Bluetooth from our Python script:
// Install the bluez package
sudo apt-get install bluez bluez-firmware
Now we can create our server in Python:
import bluetooth

server_sock=bluetooth.BluetoothSocket(bluetooth.RFCOMM)
server_sock.bind(("", bluetooth.PORT_ANY))
server_sock.listen(1)

port = server_sock.getsockname()[1]

uuid = "94f39d29-7d6d-437d-973b-fba39e49d4ee"

bluetooth.advertise_service(
    server_sock,
    "SampleServer",
    service_id = uuid,
    service_classes = [ uuid, bluetooth.SERIAL_PORT_CLASS ],
    profiles = [ bluetooth.SERIAL_PORT_PROFILE ],
)

print("Waiting for connection on RFCOMM channel %d" % port)

client_sock, client_info = server_sock.accept()
print("Accepted connection from ", client_info)

try:
    while True:
        data = client_sock.recv(1024)
        if len(data) == 0: break
        print("received [%s]" % data)
except IOError:
    pass

print("disconnected")

client_sock.close()
server_sock.close()
print("all done")
On the phone
To have Bluetooth in our application, we needed to add a few lines in the manifest to allow the use of Bluetooth resources:
<uses-permission android:name="android.permission.BLUETOOTH" />
<uses-permission android:name="android.permission.BLUETOOTH_ADMIN" />
Client creation:
public class MainActivity extends AppCompatActivity {
    private BluetoothAdapter m_btAdapter = null;
    private BluetoothDevice m_btDevice = null;
    private BluetoothSocket m_btSocket = null;
    private OutputStream m_btOutStream = null;
    static int kRequestEnableBT = 12;
    static String kAddressBT = "00:00:00:00:00:00";  // MAC address of the Raspberry Pi Bluetooth device
    static final UUID kUUID = UUID.fromString("00001101-0000-1000-8000-00805F9B34FB"); // dummy, but valid, uuid

    @Override
    protected void onCreate(Bundle savedInstanceState) {
        super.onCreate(savedInstanceState);
        setContentView(R.layout.activity_main);
        ...
        // Init the bluetooth adapter
        m_btAdapter = BluetoothAdapter.getDefaultAdapter();
        if (m_btAdapter != null && m_btAdapter.isEnabled() == false) {
            Intent enableBtIntent = new Intent(BluetoothAdapter.ACTION_REQUEST_ENABLE);
            startActivityForResult(enableBtIntent, kRequestEnableBT);
        }
        startBT();
    }

    @Override
    protected void onDestroy() {
        stopBT();
        super.onDestroy();
    }

    // Print some debug info on our myText field
    private void debugBT(String msg) {
        TextView myText = findViewById(R.id.myText);
        myText.setText(msg);
    }

    // Init the Bluetooth connection
    private void startBT() {
        if (m_btAdapter == null) {
            debugBT("no adapter");
            return;
        }

        debugBT("get remote device...");
        m_btAdapter.cancelDiscovery();
        m_btDevice = m_btAdapter.getRemoteDevice(kAddressBT);
        if (m_btDevice == null) {
            debugBT("no device");
            return;
        }

        debugBT("create socket...");
        try {
            m_btSocket = m_btDevice.createInsecureRfcommSocketToServiceRecord(kUUID);
        }
        catch (Exception e) {
            m_btSocket = null;
            debugBT( e.getMessage());
            return;
        }

        debugBT("connect...");
        try {
            m_btSocket.connect();
        }
        catch (Exception e) {
            m_btSocket = null;
            debugBT( e.getMessage());
            return;
        }

        try {
            m_btOutStream = m_btSocket.getOutputStream();
            debugBT("connected");
        }
        catch (Exception e) {
            m_btSocket = null;
            debugBT( e.getMessage());
        }
    }

    // Terminate the Bluetooth connection
    private void stopBT() {
        if (m_btOutStream != null) {
            try {
                m_btOutStream.flush();
            }
            catch (Exception e) {
            }
            m_btOutStream = null;
        }
        if (m_btSocket != null) {
            try {
                m_btSocket.close();
            }
            catch (Exception e) {
            }
            m_btSocket = null;
        }
        debugBT("disconnected");
    }

    // Send a message via the Bluetooth socket
    private void sendMessage(String msg) {
        if(m_btOutStream == null) {
            return;
        }

        try {
            m_btOutStream.write(msg.getBytes());
        }
        catch(Exception e) {
        }
    }

    // Listen to the button and send a message over Bluetooth
    private OnClickListener onMyButtonClicked = new OnClickListener() {
        public void onClick(View v) {
            sendMessage("myButton has been clicked");
        }
    }
}
Setting up a unidirectional connection via Bluetooth is ultimately quite easy. But our Raspberry Pi systematically requested pairing authorization every time the phone initialized the connection. More research on this point was needed, as the objective was to no longer have “human interaction” with the Raspberry Pi once it was onboard the boat.
Session #3, controlling the motor and servo
To control the motor and servo from the phone, we established a simple “communication protocol”:
"throttle = [decimal value]"
0 : motor stop
]0, 1] : forward
[-1, 0[ : reverse
“steering = [decimal value]”
0 : servo at 90
]0, 1] : servo at 0: turn left
[-1, 0[ : servo at 180: turn right
Code on the Raspberry Pi:
// Init GPIO for servo and motor
// Init Bluetooth socket
...

def setThrottle(speed):
    // For now we only support 2 speeds: stop and max forward
    if speed > 0:
        GPIO.output(kMotorPin,GPIO.HIGH)
    else:
        GPIO.output(kMotorPin,GPIO.LOW)

def setSteerring(angle):
    // For now we only support 3 directions: full left, straight or full right
    if angle == 0:
        myServo.ChangeDutyCycle(2.5)
    else if angle < 0:
        myServo.ChangeDutyCycle(12.5)
    else:
        myServo.ChangeDutyCycle(7.5)

try:
    while True:
        data = client_sock.recv(1024)
        if len(data) == 0: break
        [key, value] = data.split('=')
        key = key.strip()
        value = float(value.strip())

        if (key == "throttle") {
            setThrottle(value)
        }
        if (key == "steering") {
            setSteerring(value)
        }

except IOError:
    pass

...
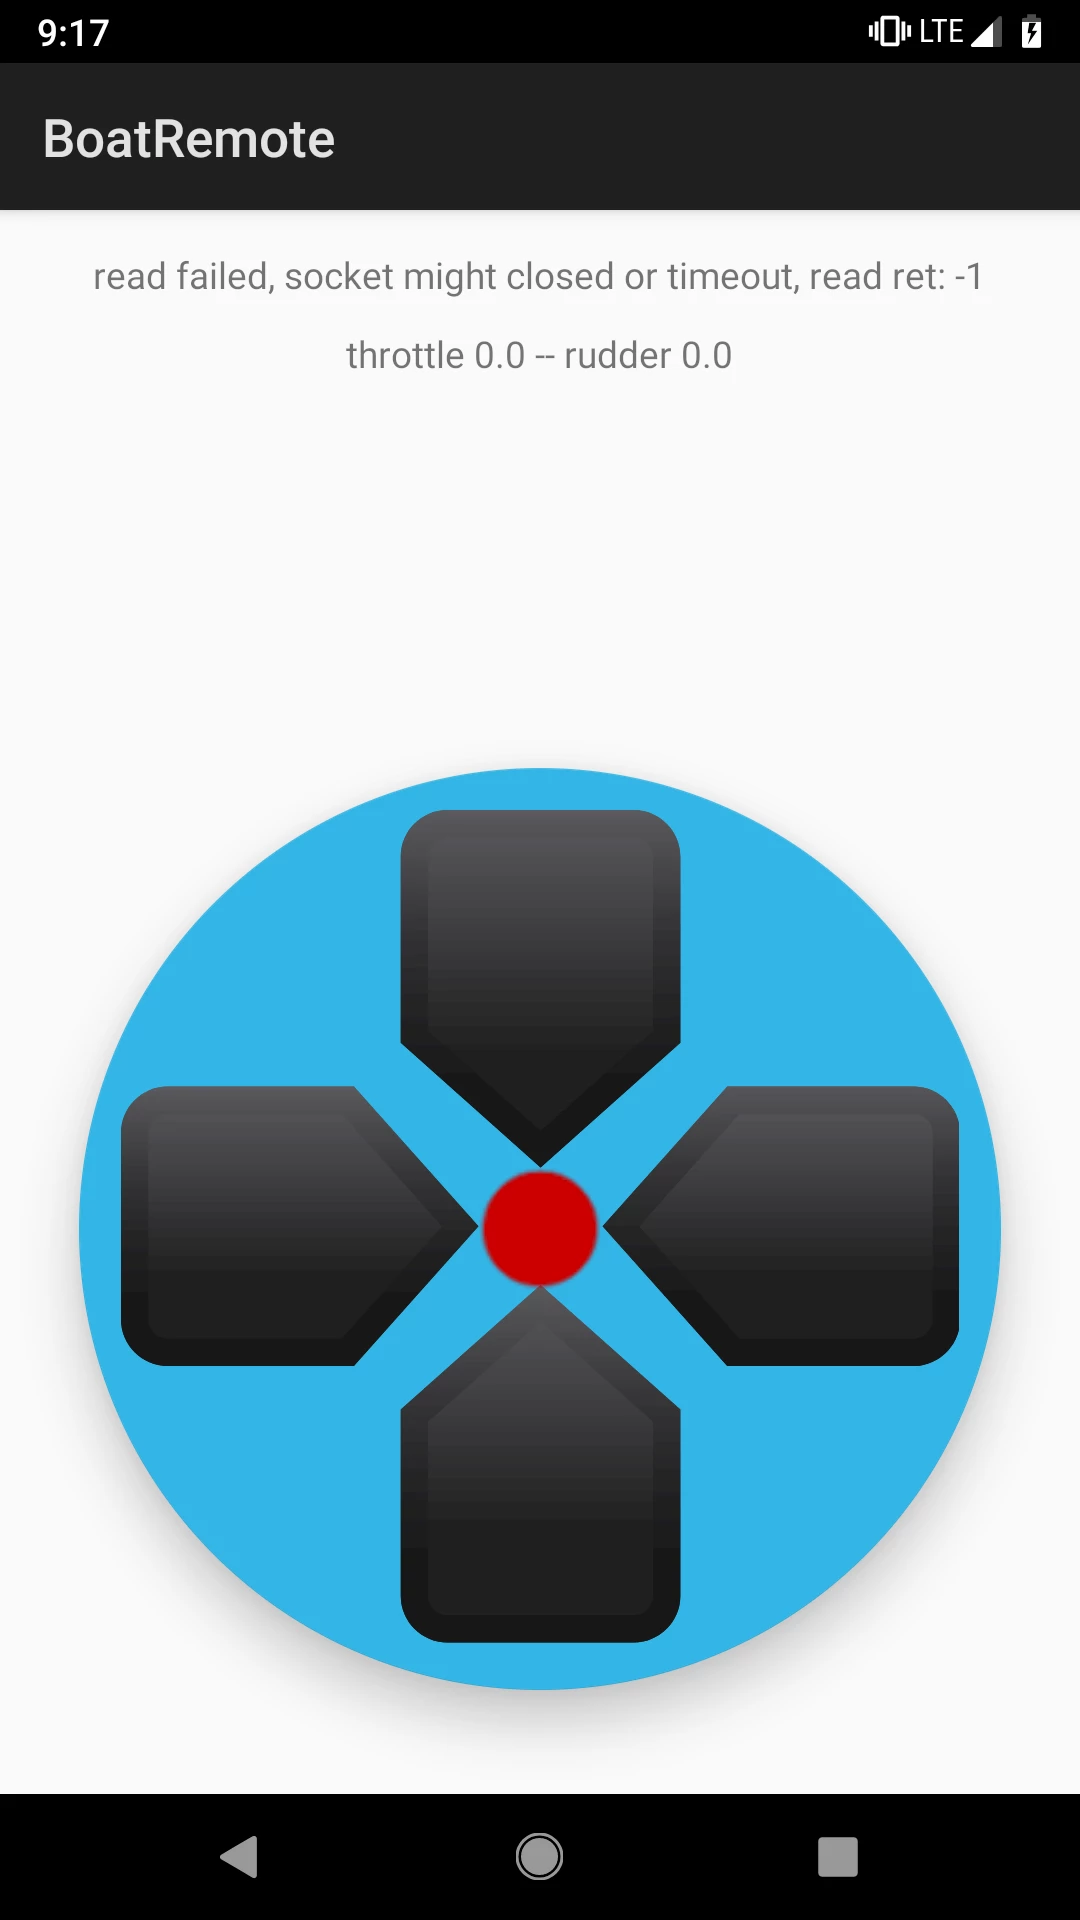
Code on the phone:
public class MainActivity extends AppCompatActivity {
    // Bluetooth variables
    ...

    @Override
    protected void onCreate(Bundle savedInstanceState) {
        super.onCreate(savedInstanceState);
        setContentView(R.layout.activity_main);
        ...
        // Init the Bluetooth adapter
        ...

        // dpadButton is a float action button with a directionnal pad as image
        FloatingActionButton dpadButton = findViewById(R.id.dpadButton);
        dpadButton.setOnTouchListener(handleDPadTouch);
    }

    @Override
    public void onStop() {
        super.onStop();
        stopMotion();
    }

    // onDestroy
    // debugBT
    // startBT
    // stopBT
    // sendMessage

    private void sendMotion(float speed, float angle) {
        sendMessage("throttle = " + speed);
        sendMessage("steering = " angle);
    }

    private void stopMotion(float speed) {
        sendMotion(0.f, 0.f);
    }

    private static float clampValue(float value, float max, float min) {
        return Math.min( max, Math.max( value, min) );
    }

    private static float mapValue(float max, float value) {
        return clampValue( 1.f - (value-max)/max, 1.f, -1.f);
    }

    private View.OnTouchListener handleDPadTouch = new View.OnTouchListener() {
        @Override
        public boolean onTouch(View view, MotionEvent event) {
            if (event.getActionMasked() == MotionEvent.ACTION_UP) {
                stopMotion();
                return true;
            }
            // From the touch position, get the vector from the center of the
            // dpadButton and retrieve the speed and angle
            float x = view.getWidth() / 2.f;
            float y = view.getHeight() / 2.f;
            float radius = Math.min(view.getWidth(), view.getHeight()) / 2.f;

            float speed = mapValue(radius, y + event.getY());
            float angle = - mapValue(radius, x + event.getX());
            sendMotion(speed, angle);
            return true;
        }
    };
}
Servo and motor control from the phone worked, but at this point, it was not possible to vary the speed of the motor or to put it in reverse, since the IO pins of the Raspberry Pi only provide 0 or +Vcc.
Session #4, controlling the motor
This session was devoted to trying to get the boat's motor to work properly, but in addition to requiring 7V, more than the 5V of the motor from the starter kit we had used in our previous tests, it requires a much higher amperage than the Raspberry Pi can provide. In the meantime, we improved the user interface of the application.
Session #5, controlling the motor, take 2
The first solution would have been to use a relay to control the motor. A relay consists of two independent electrical circuits: a control circuit, connected to the Raspberry Pi, and a power circuit, connected to the boat’s motor and battery. When voltage is applied to the control circuit, the power circuit becomes closed, allowing the electricity to flow. We could then drive the motor with the Raspberry Pi, but the problem remained: no variable speed or reverse functions.
The second solution would be to use two relays. With two relays, more or less connected in parallel, and each controlled by a pin on the Raspberry Pi, the motor could be operated in forward and reverse mode. But there is still one problem: no variable speed!
When the motor was about to work just fine, we had a little accident: after some improper handling, a wire touched the wrong contact and the Raspberry Pi... died.
Session #6, plan B
Using another Raspberry Pi would have been the easy solution, but after holding the Raspberry Pi and the boat in our hands, one thing became clear: the computer could never have been inserted in the boat without modifications. So we decided on a technical change: using an Arduino Mini instead.
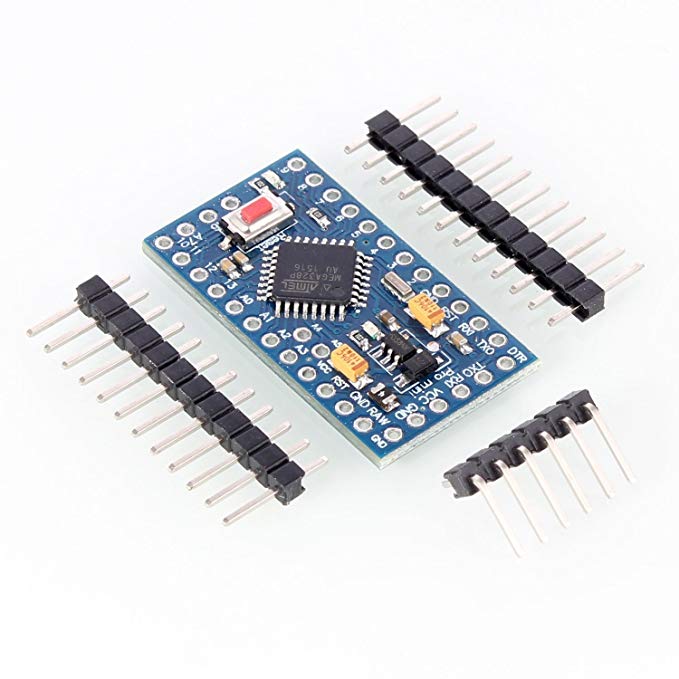
The Arduino Mini is not a computer like the Raspberry Pi, but a microcontroller. It does only one thing, i.e. what we program it to do. Another change: no more Python; we used instead a language similar to C.
To program the Arduino Mini, you must use the Arduino IDE on a computer. Once the program is edited in the IDE, it must compiled by the IDE before it can be transferred to the Arduino Mini. Of course, in order for it to transfer, it must be connected to the computer. As its name suggests, the Arduino Mini is very small. So small, in fact, that it does not have any connectors to connect directly; but it does have Tx and Rx pins to make a serial connection.
Using a USB-to-TTL module connected to the Arduino (Tx-Rx, Rx-Tx), you can connect the Arduino Mini to the computer.
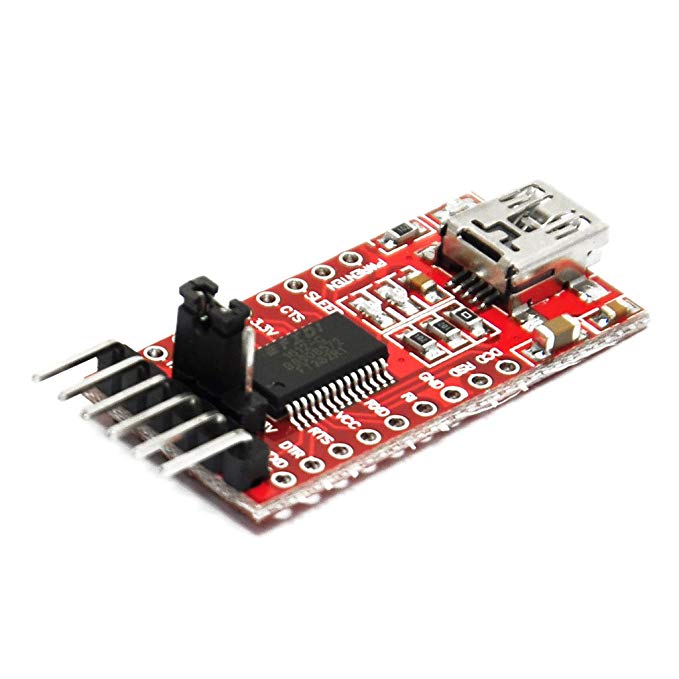
Arduino, “Hello World”
Blinking the integrated LED on the card:
void loop() {
    // loop() is a system function that will be called repeatedly

    // send some voltage to the built-in LED
    digitalWrite(LED_BUILTIN, HIGH);
    // the builtin led in now ON

    delay(500);

    // send no voltage to the built-in LED
    digitalWrite(LED_BUILTIN, LOW);
    // the builtin led in now OFF

    delay(500);
}
Running the motor:
#define kMotorPin 10

void loop() {
    digitalWrite(kMotorPin, HIGH);
    // the motor now turns forward

    delay(2000);

    digitalWrite(kMotorPin, LOW);
    // the motor now stops

    delay(2000);
}
At this point, we had the same power problem for the boat’s motor as we did with the Rasperry Pi. We could use two relays for forward, stop and reverse, but we still wouldn’t have variable speed.
However, we discovered that controlling a servo is even easier than with the Raspberry Pi, because the Arduino contains a specific library for servos! No need to calculate the duty cycle to get the right angle!
#include <Servo.h>

#define kServoPin 11

Servo myServo;

void setup() {
    // setup() is a system function that will be called only once,
    // when the Arduino is powered ON

    // Attach the servo to our desired pin
    myServo.attach(kServoPin);
    // Rotate the servo in neutral position
    myServo.write(90);
}

void loop() {
    // slowly rotate the servo from 90˚ (neutral) to 0˚ (full left)
    for (int angle = 90; angle != 0; angle-=5) {
        myServo.write(angle);
        delay(100);
    }

    // slowly rotate the servo from 0˚ (full left) to 180˚ (full right)
    for (int angle = 0; angle <= 180; angle+=5) {
        myServo.write(angle);
        delay(100);
    }

    // slowly rotate the servo from 180˚ (full right) to 90˚ (neutral)
    for (int angle = 180; angle >= 90; angle-=5) {
        myServo.write(angle);
        delay(100);
    }
}
Now, to be on par with the Raspberry Pi, we needed Bluetooth communication. As with the USB-to-Serial module, we used an HC-05 module.
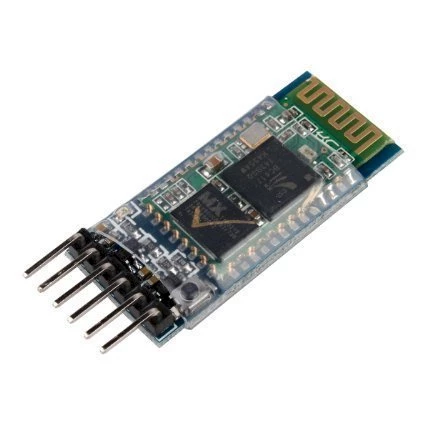
The HC-05 module connects to the Arduino Mini via the Tx and Rx pins and provides us with a Bluetooth transmitter/receiver. But before we could use it, we had to configure it.
To do this, we connected the HC-05 to the USB-to-TTL (Tx-Rx, Rx-Tx). Then, we connected the USB-to-TTL to the computer by holding down the HC-05 button.
The HC-05 lit up in “AT Command” mode, which allowed us to see and modify the module configuration. With the “Serial Monitor” connection tool of the Arduino IDE, we were able to connect to the module and execute some commands. The most interesting were:
    // check that module and AT mode are ok
    AT
    // should return "OK"

    // get the current module name
    AT+NAME?

    // set the module name
    AT+NAME=myName

    // get the mac address of the module
    AT+ADDR?

    // get the current PIN code
    AT+PSWD?

    // set the PIN CODE
    AT+PSWD=1234

    // get the current serial settings
    AT+UART?

    // set the serial setting to baud rate = 38400, stop bit = 1, parity = 0
    AT+UART=38400,1,0
If you modify the serial configuration of the module (AT+UART), you also need to change the configuration of “Serial Monitor” for subsequent use.
At this point, we should be able to set up the “Bluetooth server” on the Arduino Mini and connect with the Android application already created (after updating the MAC address).
void setup() {
    // initialize the serial connection between the ArduinoMini and the HC-05 module
    // baud rate 38400 as we configured the HC-05
    // SERIAL_8N1 which correspond to 8 data bits, no parity and on stop bit (as the HC-05)
    Serial.begin(38400, SERIAL_8N1);
    Serial.setTimeout(100);

    // turn off the built-in LED
    digitalWrite(LED_BUILTIN, LOW);
}

void loop() {
  if(Serial.available() > 0) {
      // we received something !!!
      // let turn the built-in LED on
      digitalWrite(LED_BUILTIN, HIGH);
  }
}
We connected the Arduino Mini to the USB-to-TTL and the USB-to-TTL to the computer, compiled, and transferred to the Arduino Mini. We disconnected the Arduino Mini from the USB-to-TTL, plugged it back into the HC-05 and a power supply, and waited...
We launched our application on the phone and, as we hoped, the Arduino Mini’s LED lit up! We had a connection, but was the data we received correct (speed, parity...)? We’ll see about that another time!
In short: Arduino programming is very simple. The Arduino Mini being very minimalistic, it made us juggle a little more, constantly plugging and unplugging the USB-to-TTL and HC-05.
Session #7, validating the connection
Since we were now able to control the servo and have a Bluetooth connection, it was time to operate the servo from the phone.
First of all, we changed the protocol defined during the third session. The Arduino Mini being much less powerful than the Raspberry Pi (8/16 MHz vs 1.4 GHz), rather than sending a string of characters ("throttle =[value]"), we’ll send a single byte.
8th byte: 0 = speed, 1 = direction
7th byte: 0 = positive value, 1 = negative value
Which gave us:
x0111111 maximum positive value
x0000000 zero
x1000000 also zero
x1111111 maximum negative value
With 6 bytes, we have a range of 63 values for positive and negative, which is more than enough for our purposes.
Encoding on the phone side:
    // We want to send a byte value, but the outstream interface to send a byte
    // takes an int ! -- the 24 high-order bits are ignored.
    // So we are going to work with int only
    private void sendByte(int value) {
        if(m_btOutStream == null) {
            return;
        }

        try {
            m_btOutStream.write(value);
        }
        catch(Exception e) {
        }
    }

    static int kThrottleMask = 0x80;
    static int kNegativeMask = 0x40;
    static int kValueMask    = 0x3F;

    // Convert a float value to 7bits
    private static int convertToByte(float value) {
        // 7th bit indicative a negative value
        // 011 1111 : positive max
        // 000 0000 : zero
        // 100 0000 : also zero
        // 111 1111 : negative max

        // the input value is expected to be in the range [-1, 1]
        int intValue = (int)(value * (float)kValueMask);
        boolean isNegative = intValue < 0;
        if (isNegative) {
            intValue = -intValue;
            intValue |= kNegativeMask;
        }
        return intValue;
    }

    private void sendMotion(float speed, float angle) {
        sendByte(kThrottleMask | convertToByte(speed));
        sendByte(convertToByte(angle));
    }
Decoding on the Arduino Mini side:
#define kThrottleMask 0x80
#define kNegativeMask 0x40
#define kValueMask    0x3F

#define kSteeringPin      11
#define kSteeringLeftMax  45    // angle in degrees
#define kSteeringNeutral  90    // angle in degrees
#define kSteeringRightMax 135   // angle in degrees
// LeftMax and RightMax angles can be adjusted

Servo mySteeringServo;

void setup() {
    Serial.begin(38400, SERIAL_8N1);
    Serial.setTimeout(100);

    mySteeringServo.attach(kSteeringPin);
    mySteeringServo.write(kSteeringNeutral);
}

void loop() {
    if (Serial.available() > 0) {
        // Serial.read return a byte as an int
        int value = Serial.read();

        bool isThrottle = (value & kThrottleMask) == kThrottleMask;
        bool isNegative = (value & kNegativeMask) == kNegativeMask;
        value &= kValueMask;

        if (isThrottle) {
            // Do nothing for now
        }
        else {
            int maxValue = isNegative ? kSteeringLeftMax : kSteeringRightMax;
            // convert value from input range [0, kValueMask] to steering range [kSteeringNeutral, maxValue]
            value = map(value, 0, kValueMask, kSteeringNeutral, maxValue);
            mySteeringServo.write(value);
        }
    }
}
After transferring the program to the Arduino Mini, connect the servo and Bluetooth module to it and hit play. If all goes well, you should be able to run the servo from the phone. If this does not work, check the Bluetooth module settings and start again. The LED can also be used to validate the status of isThrottle and isNegative.
Session #8, getting the variable speed
We already know that the motor can be driven bidirectionally (using two relays). To be able to add the variable speed function, we could probably have added MOSFETs. Instead, to avoid messing around with electronics more than our basic mission required, we used an ESC (Electronic speed control).
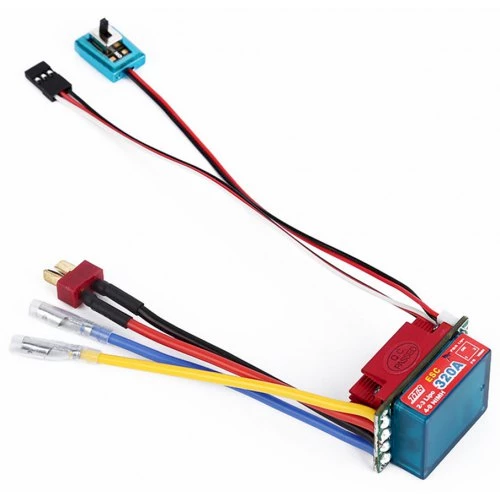
Unfortunately, the ESC arrived without any documentation. After some research, we found out that basically, the ESC has a power circuit, to which we connected our battery and motor, and a control circuit, to which we connected the Arduino Mini, the HC-05 and the servo. The control circuit is powered by the ESC in 5V, which is perfect for our modules! In addition, ESC control is done with pulse-code modulation (PWM), like our servo. So it should be quite easy to use.
#define kThrottlePin         12
#define kThrottleReverseMax  1000   // micro seconds
#define kThrottleNeutral     1500   // micro seconds
#define kThrottleForwardMax  2000   // micro seconds
// Throttle values comes from Servo.writeMicroseconds() documentation
// may need to be adjusted depending on ESC

Servo myThrottleServo;

void setup() {
    ...

    myThrottleServo.attach(kThrottlePin);
    myThrottleServo.write(kThrottleNeutral);
}

void loop() {
    ...
    if (isThrottle) {
        int maxValue = isNegative ? kThrottleReverseMax : kThrottleForwardMax;
        // convert value from input range [0, kValueMask] to throttle range [kThrottleNeutral, maxValue]
        value = map(value, 0, kValueMask, kThrottleNeutral, maxValue);
        myThrottleServo.writeMicroseconds(value);
    }
    ...
}
Once the Arduino Mini was programmed, I hurried to test it. Uhhhh, the ESC lights came on when throttle commands were sent, but the motor didn’t run! After some more research, I discovered that the ESC needed to be “activated” by a sequence.
void setup() {
    ...

    myThrottleServo.attach(kThrottlePin);
    myThrottleServo.write(kThrottleForwardMax);
    delay(2000);
    myThrottleServo.write(kThrottleNeutral);
    delay(2000);
}
Aha! Now, the motor could be controlled at variable speeds in forward “and” in reverse. There was still a problem, though: reverse worked properly only until I switched to forward. Once forward was engaged, I could no longer shift into reverse! More research later, it appeared that some ESCs have a protection mode to avoid breaking motors or other mechanical parts (such as gears) by abruptly shifting from forward to reverse.
#define kThrottlePin         12
#define kThrottleReverseMax  1000   // micro seconds
#define kThrottleReverseMin  1450   // micro seconds
#define kThrottleNeutral     1500   // micro seconds
#define kThrottleForwardMin  1550   // micro seconds
#define kThrottleForwardMax  2000   // micro seconds
#define kThrottleMagicNumber 10

...

bool needReverseSequence = false;
void updateThrottle(int value) {
    if (value > kThrottleReverseMin && value < kThrottleForwardMin) {
        // value in the neutral zone
        value = kThrottleNeutral;
    }
    else if (value >= kThrottleForwardMin) {
        // next time we want do go in reverse we’ll need to do something!
        needReverseSequence = true;
    }
    else if (needReverseSequence) {
        // we were in forward motion before we need to do some black magic!
        myThrottleServo.writeMicroseconds(kThrottleReverseMin-kThrottleMagicNumber);
        delay(100);
        myThrottleServo.writeMicroseconds(kThrottleNeutral+kThrottleMagicNumber);
        delay(100);
        myThrottleServo.writeMicroseconds(kThrottleReverseMin-kThrottleMagicNumber);
        delay(100);
    }
    myThrottleServo.writeMicroseconds(value);
}

void loop() {
    ...
    if (isThrottle) {
        int maxValue = isNegative ? kThrottleReverseMax : kThrottleForwardMax;
        // convert value from input range [0, kValueMask] to throttle range [kThrottleNeutral, maxValue]
        value = map(value, 0, kValueMask, kThrottleNeutral, maxValue);
        updateThrottle(value);
    }
    ...
}
We were finally able to go from forward to reverse! It took much trial and error to find “one” valid sequence and the “magic number”.
In conclusion
On the Android side, with an interface as simple as ours, the development was relatively simple. Perhaps the most complicated thing was to have the desired user interface. For the rest, such as activating Bluetooth and creating the connection, it was relatively easy to set up, thanks to good documentation.
As for the Raspberry Pi, not too much to worry about here either. If it had survived to the end of our project, it would probably have been oversized in relation to our needs. And we might have had trouble configuring it correctly so that only our application was executed at startup.
And finally, the Arduino Mini: apart from its lack of interface that forced us to juggle with it a little bit to program and debug, it proved very simple to accomplish our objectives with it. The reason is that the microcontroller is designed primarily for this type of application: controlling lights, motors, servos...
The hardest battle was definitely to obtain documentation for the ESC.
